About X Spaces

Spaces is a way to have live audio conversations on X. Anyone can join, listen, and speak in a Space on X for iOS and Android. Currently you can listen in a Space on web.


How to use Spaces

How do you start a Space?
Step 1

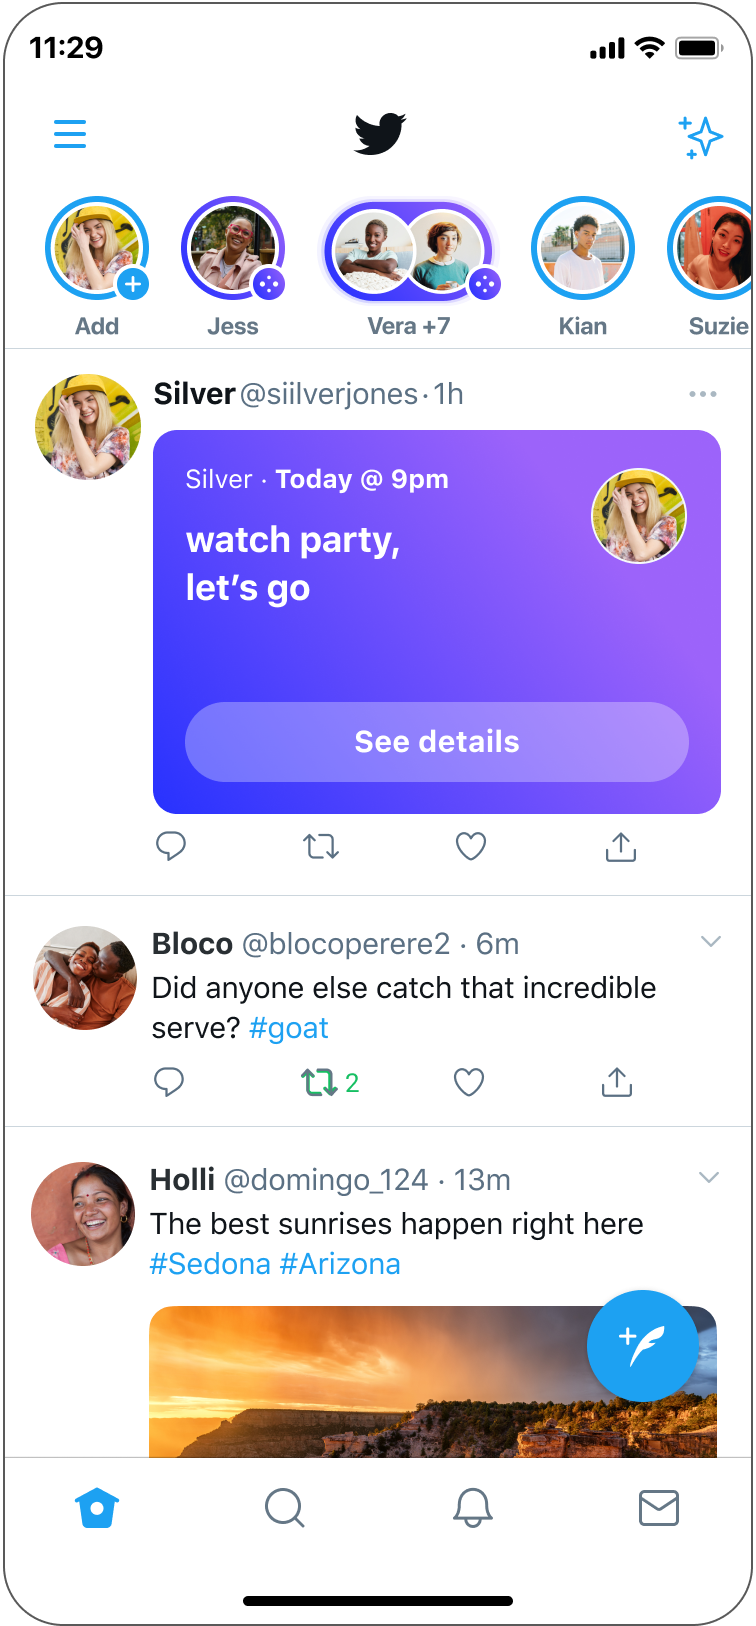
The creator of a Space is the host. As a host on iOS, you can start a Space by long pressing on the post Composer  from your Home timeline and and then selecting the Spaces   icon.

You can also start a Space by selecting the Spaces tab on the bottom of your timeline.

Step 2

Spaces are public, so anyone can join as a listener, including people who don’t follow you. Listeners can be directly invited into a Space by DMing them a link to the Space, posting out a link, or sharing a link elsewhere.

Step 3

Up to 13 people (including the host and 2 co-hosts) can speak in a Space at any given time. When creating a new Space, you will see options to Name your Space and Start your Space.

Step 4

To schedule a Space, select Schedule for later. Choose the date and time you'd like your Space to go live.

Step 5

Once the Space has started, the host can send requests to listeners to become co-hosts or speakers by selecting the people icon  and adding co-hosts or speakers, or selecting a person’s profile picture within a Space and adding them as a co-host or speaker. Listeners can request permission to speak from the host by selecting the Request icon below the microphone.

Step 6

When creating a Space, the host will join with their mic off and be the only speaker in the Space. When ready, select Start your Space.

Step 7

Allow mic access (speaking ability) to speakers by toggling Allow mic access to on.

Step 8

Get started chatting in your Space.

Step 9

As a host, make sure to post out the link to your Space so other people can join. Select the  icon to Share via a post.

Step 1

The creator of a Space is the host. As a host on Android, you can start a Space by long pressing the post Composer  on your Home timeline and selecting the Spaces  icon.

You can also start a Space by selecting the Spaces tab on the bottom of your timeline.

Step 2

Spaces are public, so anyone can join as a listener, including people who don’t follow you. Listeners can be directly invited into a Space by DMing them a link to the Space, posting out a link, or sharing a link elsewhere.

Step 3

Up to 13 people (including the host and 2 co-hosts) can speak in a Space at any given time. When creating a new Space, you will see options to Name your Space and Start your Space.

Step 4

To schedule a Space, select Schedule for later. Choose the date and time you'd like your Space to go live.

Step 5

Once the Space has started, the host can send requests to listeners to become co-hosts or speakers by selecting the people icon  and adding co-hosts or speakers, or selecting a person’s profile picture within a Space and adding them as a co-host or speaker. Listeners can request permission to speak from the host by selecting the Request icon below the microphone.

Step 6

When creating a Space, the host will join with their mic off and be the only speaker in the Space. When ready, select Start your Space.

Step 7

Allow mic access (speaking ability) to speakers by toggling Allow mic access to on.

Step 8

Get started chatting in your Space.

Step 9

As a host, make sure to post out the link to your Space so other people can join. Select the  icon to Share via a post.


Spaces FAQ

Anyone can join, listen, and speak in a Space on X for iOS and Android. Currently, starting a Space on web is not possible, but anyone can join and listen in a Space.

People on X for iOS and Android can start a Space.

For now, all Spaces are public like posts, which means they can be accessed by anyone. They will automatically appear at the top of your Home timeline, and each Space has a link that can be shared publicly. Since Spaces are publicly accessible by anyone, it may be possible for people to listen to a Space without being listed as a guest in the Space.

We make certain information about Spaces available through the X Developer Platform, such as the title of a Space, the hosts and speakers, and whether it is scheduled, in progress, or complete. For a more detailed list of the information about Spaces we make available via the X API, check out our Spaces endpoints documentation

Since all Spaces are public, your presence and activity in a Space is also public unless you choose to listen to a Space anonymously. If you are logged into your X account and when you are in a Space and not listening anonymously, you will be visible to everyone in the Space as well as to others, including people who follow you, people who peek into the Space without entering, and developers accessing information about the Space using the X API.

Unless you are listening anonymously, if you are listening to a Space, your profile icon will appear with a purple pill at the top of your followers’ Home timelines. You have the option to change this in your settings.

Manage who can see your Spaces listening activity
Step 1

Select your profile photo on the top left menu and navigate to Settings and privacy.

Step 2

Under Settings, go to Privacy and safety and then to Spaces.

Step 3

Choose if you want to Allow followers to see which Spaces you’re listening to by toggling this on or off.

Step 1

Select your profile photo on the top left menu and navigate to Settings and privacy.

Step 2

Under Settings, go to Privacy and safety and then to Spaces.

Step 3

Choose if you want to Allow followers to see which Spaces you’re listening to by toggling this on or off.

Step 1

On the left nav menu, select the more  icon and go to Settings and privacy.

Step 2

Under Settings, navigate to Privacy and safety.

Step 3

Under Your Twitter activity, go to Spaces.

Step 4

Choose if you want to Allow followers to see which Spaces you’re listening to by toggling this on or off. 

Your followers will always see at the top of their Home timelines what Spaces you’re speaking in.

Users on X can choose to listen to a Space anonymously. Anonymous listening is off by default, but with this feature enabled, your identity will be hidden to other participants in the Space as well as to people who peek into the Space without entering. However, when you join anonymously, X will still track that you listened to the Space and may use that information to calculate listenership statistics, or to personalize your experience on X, for example by recommending other content to you. 

While listening anonymously, you cannot participate in the Space (for example, by sending emojis or speaking). To do either of these things, you will need to leave the Space and re-join with the anonymous listening feature turned off.

Spaces can be listened to by anyone on the Internet. This is part of a broader feature of Spaces that lets anyone listen to Spaces regardless of whether or not they are logged in to a X account (or even have a X account). Because of this, listener counts may not match the actual number of listeners, nor will the profile photos of all listeners necessarily be displayed in a Space. 

Invite people to join a Space by sending an invite via DM, posting the link out to your Home timeline, or copying the invite link to send it out.

For now, all Spaces are public and anyone can join any Space as a listener. If the listener has a user account, you can block their account. If you create a Space or are a speaker in a Space, your followers will see it at the top of their timeline.

By default, your Space will always be set to Only people you invite to speak. You can also modify the Speaker permissions once your Space has been created. Select the  icon, then select Adjust settings to see the options for speaker permissions, which include EveryonePeople you follow, and the default Only people you invite to speak. These permissions are only saved for this particular Space, so any Space you create in the future will use the default setting.

Once your Space has started, you can send requests to listeners to become speakers or co-hosts by selecting the  icon and adding speakers or selecting a person’s profile picture within a Space and adding them as a co-host or speaker. Listeners can request to speak from the host.

Hosts can also invite other people outside of the Space to speak via DM.

Up to 2 people can become co-hosts and speak in a Space in addition to the 11 speakers (including the primary host) at one time. Co-host status can be lost if the co-host leaves the Space. A co-host can remove their own co-host status to become a Listener again.

Hosts can transfer primary admin rights to another co-host. If the original host drops from Space, the first co-host added will become the primary admin. The admin is responsible for promoting and facilitating a healthy conversation in the Space in line with the X Rules.

Once a co-host is added to a Space, any accounts they’ve blocked on X who are in the Space will be removed from the Space.

Hosts can schedule a Space up to 30 days in advance and up to 10 scheduled Spaces. Hosts can still create impromptu Spaces in the meantime, and those won’t count toward the maximum 10 scheduled Spaces.

Before you create your Space, select the scheduler  icon and pick the date and time you’d like to schedule your Space to go live. As your scheduled start time approaches, you will receive push and in-app notifications reminding you to start your Space on time. If you don’t have notifications turned on, follow the in-app steps on About notifications on mobile devices to enable them for Spaces. Scheduled Spaces are public and people can set reminders to be notified when your scheduled Space begins.

Follow the steps below to edit any of your scheduled Spaces.

Manage your scheduled Spaces
Step 1

From your timeline, navigate to and long press on the . Or, navigate to the Spaces Tab at the bottom of your timeline.

Step 2

Select the Spaces icon.

Step 3

To manage your scheduled Spaces, select the scheduler  icon at the top.

Step 4

You'll see the Spaces that you have scheduled.

Step 5

Navigate to the more  icon of the Space you want to manage. You can edit, share, or cancel the Space.

If you are editing your Space, make sure to select "Save changes" after making edits. 

Step 1

From your timeline, navigate to the Tweet composer . Or, navigate to the  Spaces Tab  at the bottom of your timeline.

Step 2

Select the Spaces icon.

Step 3

To manage your scheduled Spaces, select the scheduler  icon at the top.

Step 4

You'll see the Spaces that you have scheduled.

Step 5

Navigate to the more  icon of the Space you want to manage. You can edit, share, or cancel the Space.

If you are editing your Space, make sure to select "Save changes" after making edits. 

Guests can sign up for reminder notifications from a scheduled Space card in a post. When the host starts the scheduled Space, the interested guests get notified via push and in-app notifications.

Hosts can record Spaces they create for replay. When creating a Space, toggle on Record Space.

While recording, a recording symbol will appear at the top to indicate that the Space is being recorded by the host. Once the Space ends, you will see how many people attended the Space along with a link to share out via a post. Under Notifications, you can also View details to post the recording. Under host settings, you will have the option to choose where to start your recording with Edit start time. This allows you to cut out any dead air time that might occur at the beginning of a Space.

If you choose to record your Space, once the live Space ends, your recording will be immediately and publicly available for anyone to listen to whenever they want. You can always end a recording to make it no longer publicly available on X by deleting your recording via the more icon on the recording itself. Unless you delete your recording, it will remain available for replay after the live Space has ended.* As with live Spaces, X will retain audio copies for 30 after they end to review for violations of the X Rules. If a violation is found, X may retain audio copies for up to 120 days in total. For more information on downloading Spaces, please see below FAQ, "What happens after a Space ends and is the data retained anywhere?"

Co-hosts and speakers who enter a Space that is being recorded will see a recording symbol (REC). Listeners will also see the recording symbol, but they will not be visible in the recording.

Recordings will show the host, co-host(s), and speakers from the live Space. 

*Note: Hosts on iOS 9.15+ and Android 9.46+ will be able to record Spaces that last indefinitely. For hosts on older app versions, recording will only be available for 30 days. For Spaces that are recorded indefinitely, X will retain a copy for as long as the Space is replayable on X, but for no less than 30 days after the live Space ended.


Clipping is a new feature we're currently testing and gradually rolling out that lets a limited group of hosts, speakers, and listeners capture 30 seconds of audio from any live or recorded Space and share it through a post if the host has not disabled the clipping function. To start clipping a Space, follow the instructions below to capture the prior 30 seconds of audio from that Space. There is no limit to the number of clips that participants in a Space can create. 

When you enter the Space as a co-host or speaker, you will be informed that the Space is clippable through a tool tip notification above the clipping  icon.

Note: Currently, creating a clip is available only on iOS and Android, while playing a clip is available on all platforms to everyone. 

Host instructions: How to turn off clipping


When you start your Space, you'll receive a notification about what a clip is and how to turn it off, as clipping is on by default. You can turn off clipping at any time. To turn it off, follow the instructions below.

Step 1

 Navigate to the more  icon.

Step 2

Select Adjust settings .

Step 3

Under Clips, toggle Allow clips off. 

Host and speaker instructions: How to create a clipping
Step 1

In a recorded or live Space that is recorded, navigate to the clipping icon. Please note that, for live Spaces, unless the clipping function is disabled, clips will be publicly available on your Twitter profile after your live Space has ended even though the Space itself will no longer be available.

Step 2

On the Create clip pop-up, go to Next

Step 3

Preview the Tweet and add a comment if you’d like, similarly to a Quote Tweet

Step 4

Select Tweet to post it to your timeline. 

Captions are not currently available for Spaces.

As a host, if you turn off clipping for all Spaces from the onset, no one will be able to clip your Spaces. If you choose to turn off clipping at any point thereafter, the feature will be unavailable moving forward. To delete clips of recorded Spaces made prior to turning off the feature, you will need to delete your Space entirely.

Anyone who creates a clip can delete the clip by deleting the associated post.

To delete a post with a clip, navigate to the more  icon and select Delete post. For more information, read How to delete a post

If you think a clip violates the X Rules, you can report it. On the post with the clip, go to the more  icon and select Report this post. Learn more about reporting a post.

You also have the option to block or mute the account that posted the clip. Navigate to the account's profile photo and from the more  icon, select the appropriate action.

See below FAQs for more information on the controls you have over your Space, blocking, and muting an account, and reporting an account or Space. 

The host and co-host(s) of a Space have control over who can speak. They can mute any Speaker, but it is up to the individual to unmute themselves if they receive speaking privileges. Hosts and co-hosts can also remove,  report, and block others in the Space.

Speakers and listeners can report and block others in the Space, or can report the Space. If you block a participant in the Space, you will also block that person’s account on X. If the person you blocked joins as a listener, they will appear in the participant list with a Blocked label under their account name. If the person you blocked joins as a speaker, they will also appear in the participant list with a Blocked label under their account name and you will see an in-app notification stating, “An account you blocked has joined as a speaker.” If you are entering a Space that already has a blocked account as a speaker, you will also see a warning before joining the Space stating, “You have blocked 1 person who is speaking.”

If you are hosting or co-hosting a Space, people you’ve blocked can’t join and, if you’re added as a co-host during a Space, anyone in the Space who you blocked will be removed from the Space. 

As a Host, you are responsible for promoting and supporting a healthy conversation in your Space and to use your tools to ensure that the X Rules are followed. The following tools are available for you to use if a participant in the Space is being offensive or disruptive:

  • Revoke speaking privileges of other users if they are being offensive or disruptive to you or others

  • Block, remove or report the user.

Here are some guidelines to follow as a Host or Co-Host:

  • Always follow the X Rules in the Space you host or co-host. This also applies to the title of your Space which should not include abusive slurs, threats, or any other rule-violating content.

  • Do not encourage behavior or content that violates the X Rules.

  • Do not abuse or misuse your hosting tools, such as arbitrarily revoking speaking privileges or removing users, or use Spaces to carry out activities that break our rules such as following schemes.

While in a Space, select the account’s profile photo to pull up the option menu. Select Block. This action will also block the account on X. Blocking someone in a Space will not automatically remove them from the Space unless you are a host or co-host of the Space. 

To mute a speaker in a live Space, select the account’s profile photo, which will pull up an option menu. Select Mute their mic and you will receive an in-app notification that will let you know the individual has been muted. You also have the option to mute all speakers in your Space at once.

Hosts, speakers, and listeners can select the  icon to see people in a Space. Since Spaces are publicly accessible by anyone, it may also be possible for an unknown number of logged-out people to listen to a Space’s audio without being listed as a guest in the Space.

If you think a Space violates the X Rules, you can report it while in the Space by selecting the more  icon and selecting Report this Space. Anyone in the Space can report it. Speakers and listeners can report a Space and any account in a Space.

To report an account in a Space, select the account’s profile photo and then select Report. You will then need to choose the reason for reporting the account.

Hosts are expected to support a healthy conversation in the Space and to use their tools to ensure that the X Rules are followed. X will not suspend any active Space unless it violates our Rules.

For now, a maximum of 13 people (including the host and up to 2 co-hosts) can speak at the same time.

There is no limit on the number of listeners.


Hosts can choose to record a Space prior to starting it. Hosts may download copies of their recorded Spaces for as long as we have them by using the Your X Data download tool.

For unrecorded Spaces, X retains copies of audio from recorded Spaces for 30 days after a Space ends to review for violations of the X Rules. If a Space is found to contain a violation, we extend the time we maintain a copy for an additional 90 days (a total of 120 days after a Space ends) to allow people to appeal if they believe there was a mistake. X also uses Spaces content and data for analytics and research to improve the service.

Links to Spaces that are shared out (e.g., via post or DM) also contain some information about the Space, including the description, the identity of the hosts and others in the Space, as well as the Space’s current state (e.g., scheduled, live, or ended). We make this and other information about Spaces available through the X Developer Platform. For a detailed list of the information about Spaces we make available, check out our Spaces endpoints documentation

For full details on what data we retain, visit our Privacy Policy.

The host of a Space has the ability to end a Space. A Space may also end if it is found to be in violation of the X Rules.

Accounts with protected posts are not able to create Spaces. They are able to join and speak in other people’s Spaces, and their presence will be visible to other participants.

Hosts, co-hosts and participants must follow the X Rules in Spaces and Hosts should use their tools to ensure the Space is healthy.  Although we will not generally take action on live Spaces, if a Space is reported, we may take enforcement actions against the Host(s) or any participants, or remove the Space altogether.

Hosts who do not follow the X Rules themselves or who facilitate or promote discussions that are not in accordance with the Rules, may be banned from all X live features including Spaces and live video. This means that you will no longer be able to host or speak in a Space. Limitations may also be placed on the Space for rules violations by Hosts. For example, the Space may be ineligible for replay. Please note that this is not a suspension from the platform itself, and bans can be appealed.


Spaces Feedback Community

We’re opening up the conversation and turning it over to the people who are participating in Spaces. This Community is a dedicated place for us to connect with you on all things Spaces, whether it’s feedback around features, ideas for improvement, or any general thoughts.

Who can join?

Anyone on Spaces can join, whether you are a host, speaker, or listener. 

How do I join the Community?

You can request to join the X Spaces Feedback Community here. By requesting to join, you are agreeing to our Community rules. 

Learn more about Communities on X


Community Spaces

As a Community admin or moderator, you can create and host a Space for your Community members to join.

Admins & moderators: How to create a Space
Step 1

Navigate to the Community landing page.

Step 2

Long press on the post Composer  and select the Spaces  icon.

Step 3

Select Spaces and begin creating your Space by adding in a title, toggling on record Space (optional), and adding relevant topics.

Step 4

Invite admins, moderators, and other people to be a part of your Space.

Step 1

Navigate to the Community landing page.

Step 2

Select the post Composer  and select the Spaces  icon.

Step 3

Select Spaces and begin creating your Space by adding in a title, toggling on record Space (optional), and adding relevant topics.

Step 4

Invite admins, moderators, and other people to be a part of your Space.

Members: How to find a Community Space

If a Community Space is live, you will see the Spacebar populate at the top of your Home timeline. To enter the Space and begin listening, select the live Space in the Spacebar.

Community Spaces FAQ

Community Spaces allows creators to create Spaces to keep their members engaged and help new people discover and join their Community. 

Only some admins and moderators will be able to host a Space, using the X for iOS and X for Android apps. Community members cannot host or start a Space within a Community, but they can ask to be a speaker in the Space.

When an admin or moderator starts a Space, community members and their followers will be notified via their notifications tab as well as the Spacebar. 

Members will receive a notification in their notifications tab and also see the Spacebar populate with the live Space. Members will also be marked as a member of the Community while the Space is live.

Note: As we are currently testing with a small group, some members may not see a notification in their notifications tab. 

Yes. You will see the purple Spacebar populated at the top of your Home timeline if a person you follow is either hosting or in the live Space.


Spaces Social Narrative


A social narrative is a simple story that describes social situations and social behaviors for accessibility.

X Spaces allows me to join or host live audio-only conversations with anyone.

Joining a Space

1. When I join a X Space, that means I’ll be a listener. I can join any Space on X, even those hosted by people I don’t know or follow.

2. I can join a Space by selecting a profile photo with a purple, pulsing outline at the top of my timeline, selecting a link from someone’s post, or a link in a Direct Message (DM).

Showing two ways to Join a Space: purple outline at the top of your Timeline, and an invitation in a Tweet.

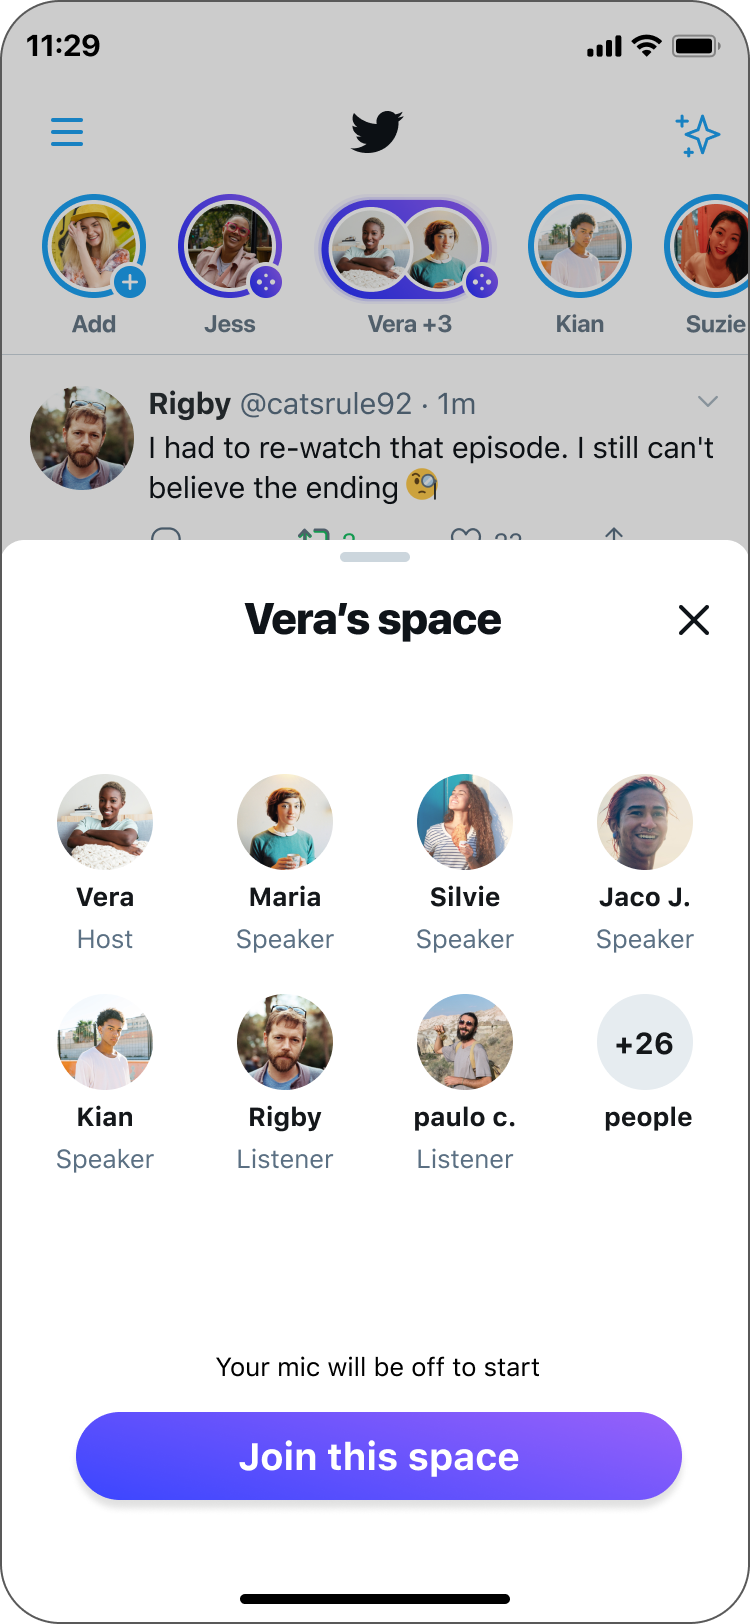
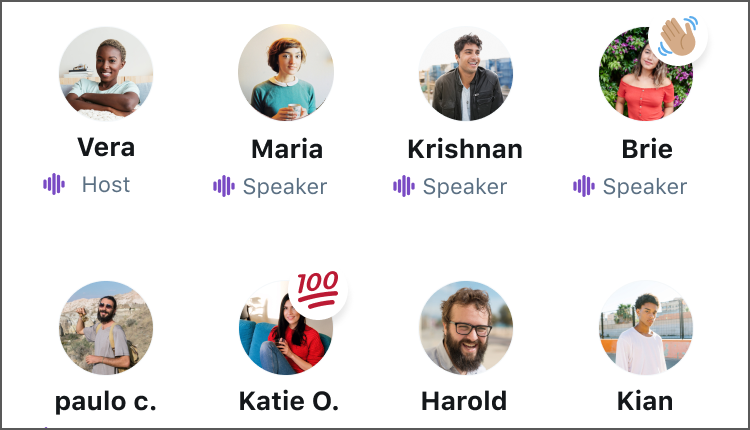
3. Once I’m in a Space, I can see the profile photos and names of some people in the Space, including myself.

Preview of the profiles and names of people who are already in the Space. The last profile shows the number of additional people in the Space: +26

4. I can hear one or multiple people talking at the same time. If it’s too loud or overwhelming, I can turn down my volume.

5. As a listener, I am not able to speak. If I want to say something, I can send a request to the host. The host might not approve my request though.

Highlighting the Request button at the bottom left of the screen.

6. If the host accepts my request, I will become a speaker. It may take a few seconds to connect my microphone, so I’ll have to wait.

7. Now I can unmute myself and speak. Everyone in the Space will be able to hear me.

A Speaker is muted upon entering the Space. The unmute button says “Mic is off.”

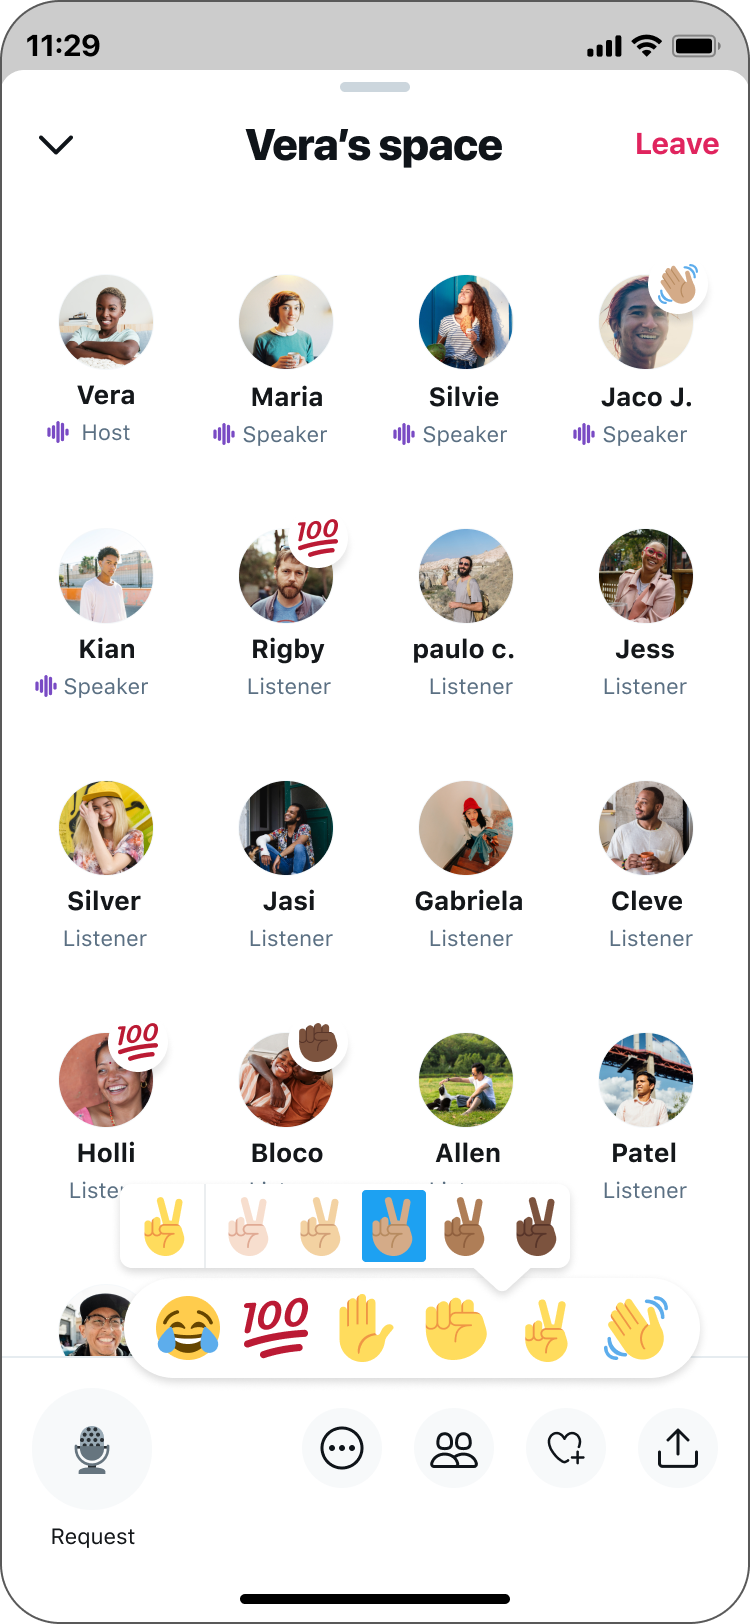
8. When someone says something I want to react to, I can choose an emoji to show everyone how I feel. I will be able to see when other people react as well.

Listener selects the “peace sign” reaction when they join the Space.

9. I can leave the Space at any time. After I leave, or when the host ends the Space, I’ll go back to my timeline.

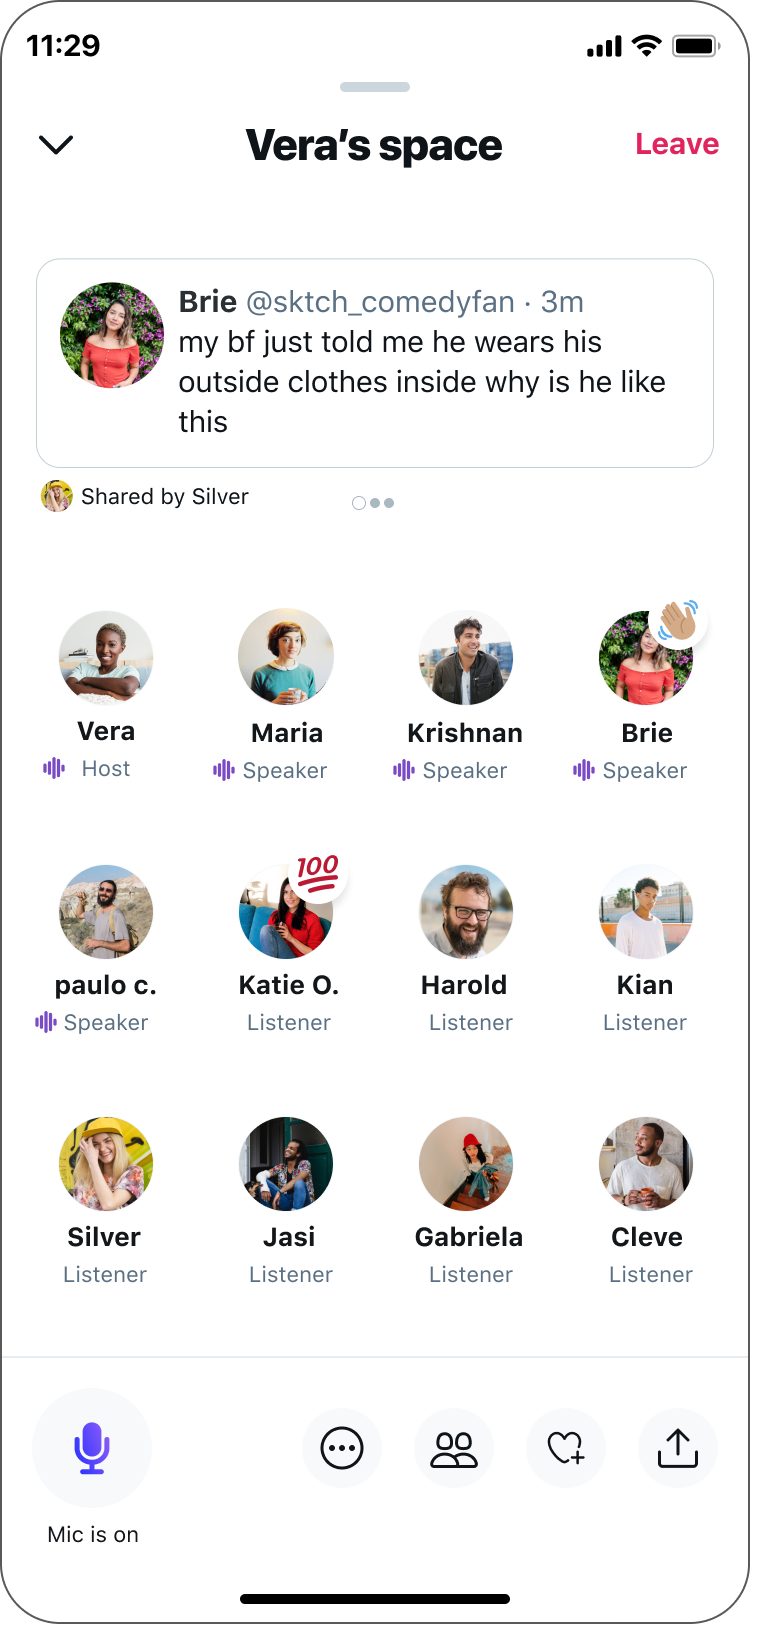
The Leave button is located in the top right of the screen, next to the Space’s name.

Hosting a Space

1. When I start a Space, that means I’ll be the host. Anyone can join my Space, even people I don’t know and people I don’t follow.

2. Once I start my space, it may take a few seconds to be connected, so I’ll have to wait.

3. Now I’m in my Space and I can see my profile photo. If other logged-in, people have joined, I will be able to see their profile photos, too.

To start, the Host is the only person in their Space.

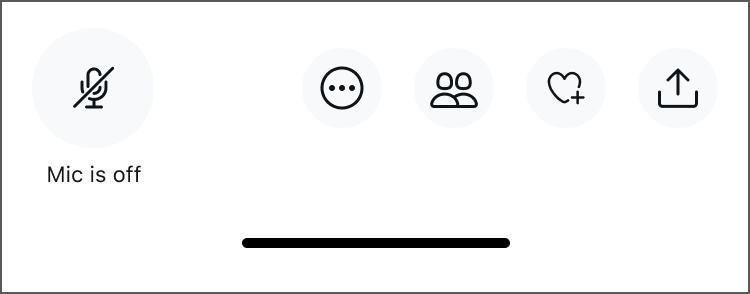
4. I will start out muted, which is what the microphone with a slash through it means. I can mute and unmute myself, and anyone in my Space, at any time.

The "Mic if off" button has a slash through the mic and is located at the bottom left of the screen.

5. I can invite people to join my Space by sending them a Direct Message (DM), sharing the link in a post, and by copying the link and sharing it somewhere else like in an email.

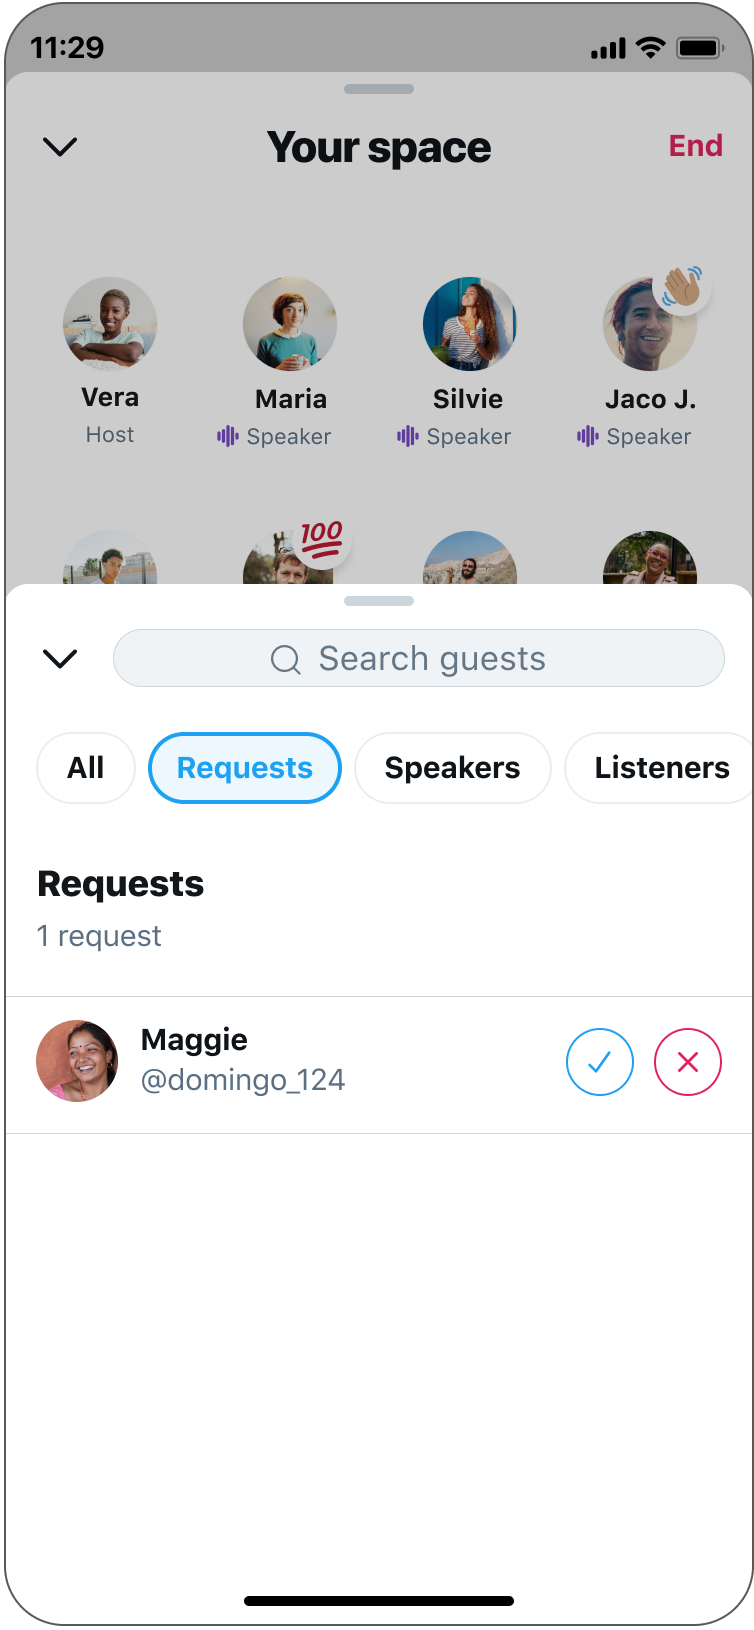
6. Up to 10 other people can have speaking privileges in my Space at the same time, and I can choose who speaks and who doesn’t. People can also request to speak, and I can choose to approve their request or not.

The Host can choose to let the person speak, by choosing the checkmark, or not, by choosing the "x".

7. When people join my Space, I may hear one or multiple people speaking at the same time. If I think they’re too loud, I can turn down my volume or mute them.

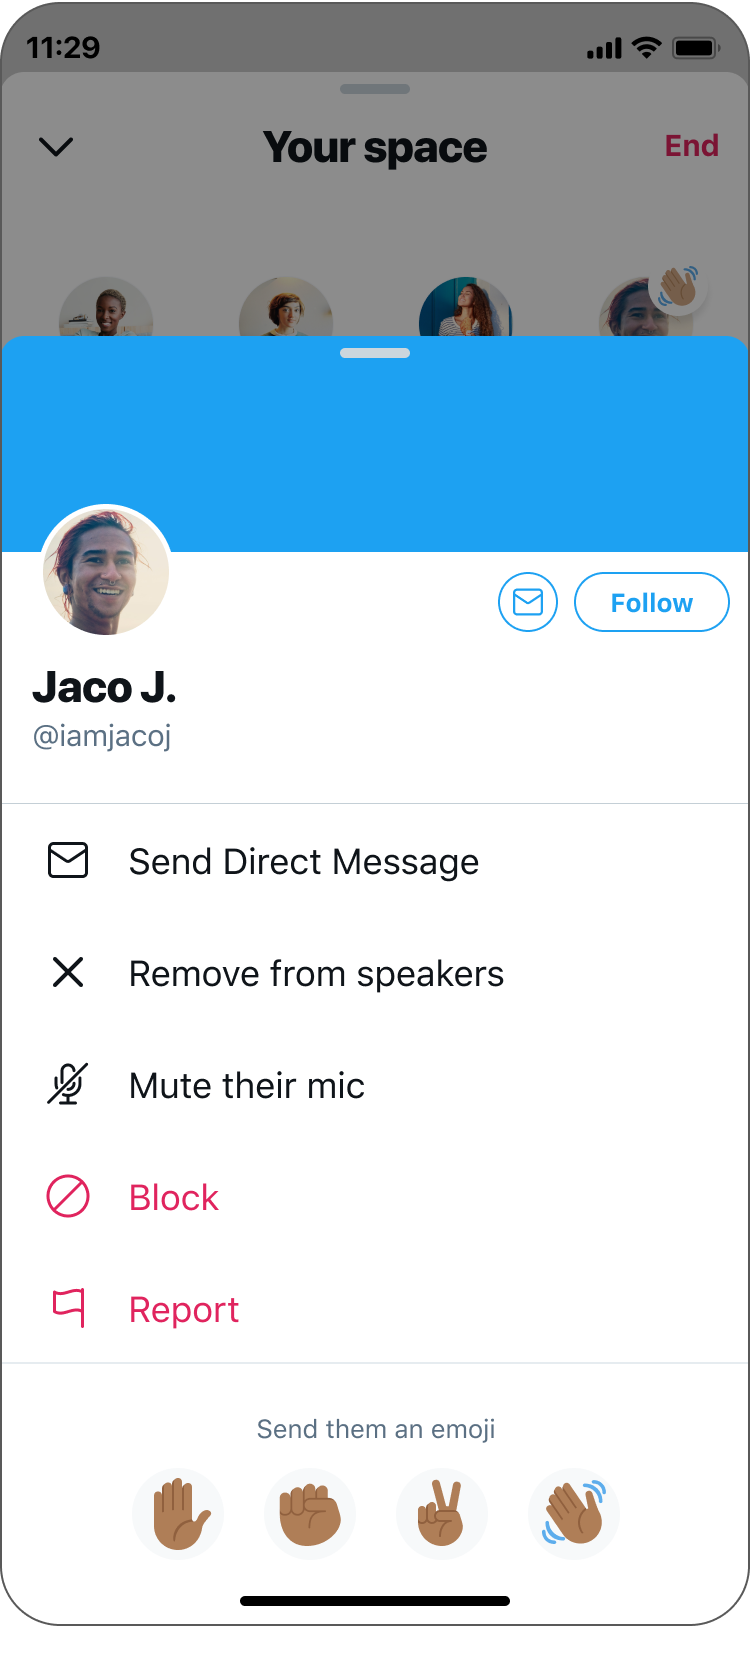
8. I can revoke speaking privileges, and block, remove or report someone if they’re being offensive or disruptive to me or others.

The Host views the Speakers and can revoke speaking capabilities if they choose.

9. When someone says something I want to react to, I can choose an emoji to show everyone how I feel. I will be able to see when other people react as well.

The reactions button is selected and 5 emoji options appear: 100, raised fist, peace sign, waving hand, face with crying tears of joy.

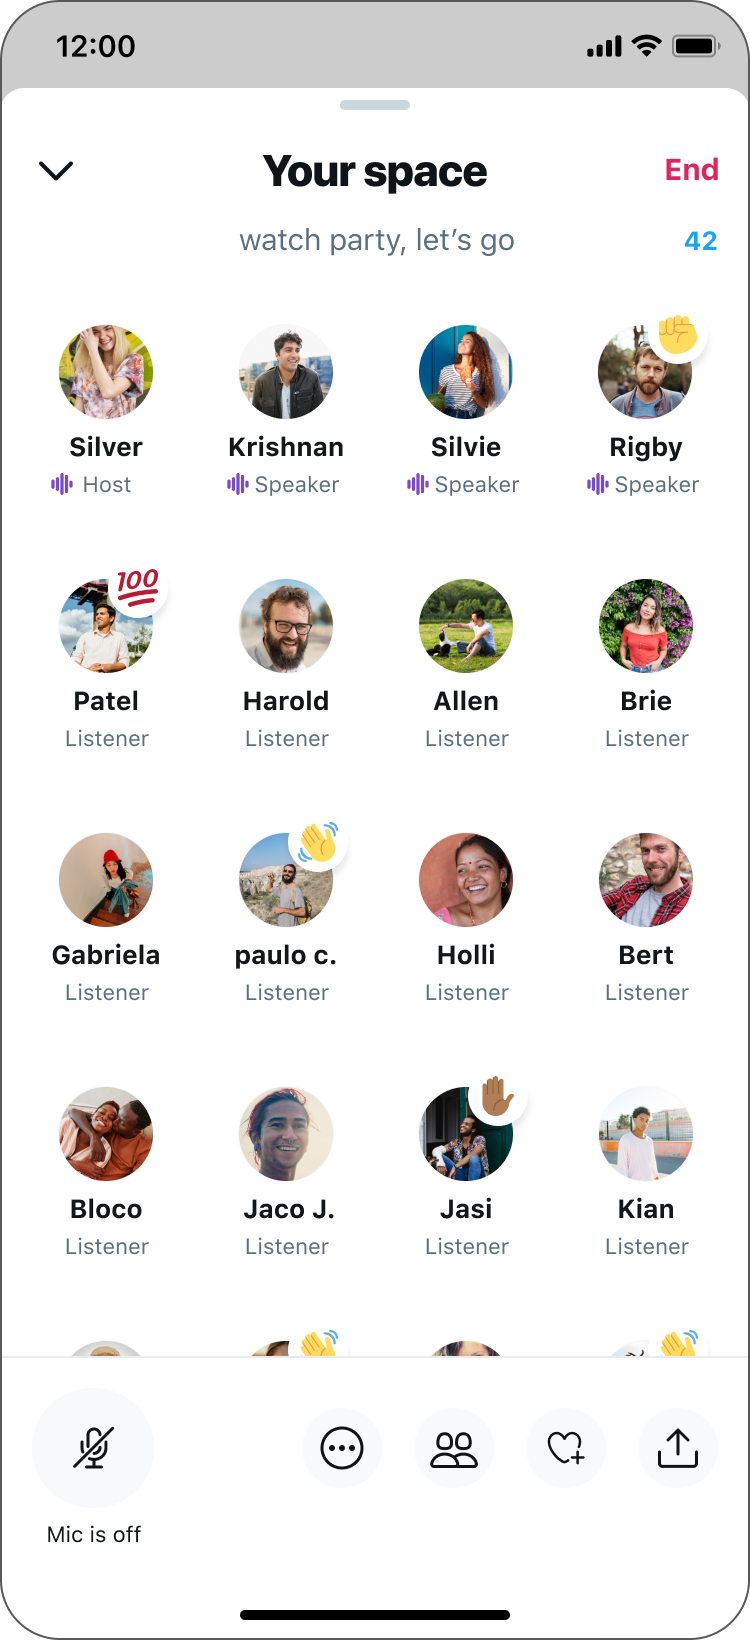
10. When I end my space it will end for everyone.
The "End" button is located in the top right corner to the right of "Your Space."

Share this article